Introduction
A few weeks ago, the Vue core team released the first minor version of Vue 3 (release notes here). This latest release of Vue brought a number of fixes and changes, but most importantly, introduced a migration path from Vue 2 to Vue 3. Bilal Haidar previously wrote about how to upgrade a Vue 2 application to Vue 3. But at this point, the Vue core team has provided a straightforward method to upgrade an existing application.
In this post, we'll explore the path to upgrade an existing Vue 2 application, as well as when to hold off on your upgrade. We will be referencing the official Migration documentation as we go through this blog post.
What is the Migration Build?
From the Vue documentation:
@vue/compat(aka "the migration build") is a build of Vue 3 that provides configurable Vue 2 compatible behavior.
The migration build runs in Vue 2 mode by default - most public APIs behave exactly like Vue 2, with only a few exceptions. Usage of features that have changed or have been deprecated in Vue 3 will emit runtime warnings. A feature's compatibility can also be enabled/disabled on a per-component basis.
What does this mean for us? In general, it means that components and application features that were written in Vue 2 will be made compatible in Vue 3. This incldues breaking changes such as v-model, which had a syntactic change in Vue 3. The intent of the migration build is to provide a way to shift your version of Vue from 2.6 to 3.1, without having to rewrite every component before it works.
During the upgrade, you will be able to start up your application and see a list of warnings reported in the browser console. These warnings reflect the various API changes between Vue 2 and 3, and are meant to guide you through the upgrade process. If you were to upgrade without the migration build, your app would crash on the first error, leading to a very frustrating experience.
The migration build is not intended to be used long-term. It is provided as a way to upgrade your codebase from Vue 2 to Vue 3, not as a way to continue using deprecated APIs. If your application is reliant on Vue 2 for a library or deprecated API, I would recommend holding off until Vue 2.7 is released (which will backport some new Vue 3 features such as the composition API).
That said, you absolutely can deploy your Vue 3 application with the migration build if you have to. From the documentation: "If you do get your app running on the migration build, you can ship it to production before the migration is complete. Although there is a small performance/size overhead, it should not noticeably affect production UX." Keep in mind that this is not the intent of the migration build, and plans should be made to migrate completely as soon as possible rather than rely on the migration build to keep old code working as expected.
Ready to Upgrade?
We will be using this repository as an example for our Vue 3 migration. It is a Vue CLI application that implements a few components: v-model, Vuex, and Vue Router. Note that we aren't using any major third-party libraries like Vuetify or Nuxt. Why does that matter?
Per the documentation:
Dependencies that rely on Vue 2 internal APIs or undocumented behavior. The most common case is usage of private properties on VNodes. If your project relies on component libraries like Vuetify, Quasar or ElementUI, it is best to wait for their Vue 3 compatible versions. The migration build can be used for [server-side rendering], but migrating a custom SSR setup is much more involved. The general idea is replacing vue-server-renderer with @vue/server-renderer. Vue 3 no longer provides a bundle renderer and it is recommended to use Vue 3 SSR with Vite. If you are using Nuxt.js, it is probably better to wait for Nuxt 3.
Because these large frameworks rely on a great deal of internal APIs or custom configuration, we will have to wait until they release their own compatible builds for Vue 3. Luckily, each of these has new builds under development already.
- Vuetify has released an alpha build of its component library. I would expect a final build sometime this year.
- Quasar has already previewed a release candidate, and should be ready to release in the near future (at the time of writing).
- Nuxt has not announced anything publicly, but in a conversation with Daniel Roe from the framework team, private alpha builds have been in testing since Q1 of 2021, with public builds expected by the end of June/start of July. A final build is expected by the end of 2021.
Keep in mind that the Vue documentation is only referencing the larger libraries and frameworks. There may be a library that you use in your project that is incompatible with Vue 3, and could cause errors even with the migration build. Upgrading to Vue 3 is a major change, and issues should be expected.
Also, there are some applications that simply won't be able to migrate, even with the migration build. Some larger applications could simply be too much effort to migrate to Vue 3, or rely on certain undocumented features that are not available in Vue 3. Per the documentation, "If your application is large and complex, migration will likely be a challenge even with the migration build. If your app is unfortunately not suitable for upgrade, do note that we are planning to backport Composition API and some other Vue 3 features to the 2.7 release."
Perform Upgrade
To perform the upgrade, we will be following the same steps as noted in the documentation. For our purposes, we will be using the Vue CLI instructions. But please refer to the documentation for using a custom Webpack build or Vite with Vue 2.
Upgrade dependencies
The first step we need to take is upgrade our tooling. Since we are using Vue CLI, we can simply run vue upgrade in the terminal. If you have any Vue CLI dependencies that need to be updated, you will see a screen like the below:

Proceed with the upgrade for each of the plugins. You may be asked for additional input depending on which plugins you have installed. In my case, I was not prompted for any additional input.
Next, we need to update the version of Vue that we're using as well as install the migration build. Run the following commands in your terminal:
# npm
npm install vue@^3.1.0 @vue/compat@^3.1.0
npm install --save-dev @vue/compiler-sfc@^3.1.0
npm uninstall vue-template-compiler
With these commands, we are installing Vue 3.1, the migration build, and the single-file component compiler for Vue 3. We then uninstall vue-template-compiler, which was the SFC compiler for Vue 2. You can also make these changes manually in package.json if you prefer.
With that, our dependencies have been updated. Consider making a commit at this point so you don't have to start from scratch if something goes wrong. Remember, this is a migration - ensure your work is being backed up just as if you were upgrading your operating system!
Configure compatibility mode in Webpack
Now that we have our dependencies, let's enable the migration build. To do that, open (or create) your vue.config.js file at the root of your project, and add the following code:
module.exports = {
  chainWebpack: config => {
    config.resolve.alias.set('vue', '@vue/compat')

    config.module
      .rule('vue')
      .use('vue-loader')
      .tap(options => {
        return {
          ...options,
          compilerOptions: {
            compatConfig: {
              MODE: 2
            }
          }
        }
      })
  }
}
What does this do? Rather than use Vue 3 itself (which would throw errors), we are configuring Webpack to use the migration build instead. We then add some configuration to vue-loader (which is used by Webpack to bundle Vue components) to return a compatConfig object. This object allows us to determine which features are enabled or disabled, and whether we are running in Vue 2 or Vue 3 mode. This configuration is available at both the global and component levels. In this instance, we are simply setting our application to Vue 2 mode, and leaving all compatibility features enabled.
Start up your application
At this point, we should be able to start our newly-migrated Vue 3 application, but we are far from done. Start up your Vue application (npm run serve for a Vue CLI app) and see what happens. You may get a number of compile-time errors (features that are completely incompatible with Vue 3, such as filters, could cause errors at this step). Fix those, then your application should render and act properly in the browser.
If you open your browser tools, you will probably notice a number of warnings in the console. Some of them will be related to your own code, others may be dependencies that you're using. Here's an example from the test runner app:
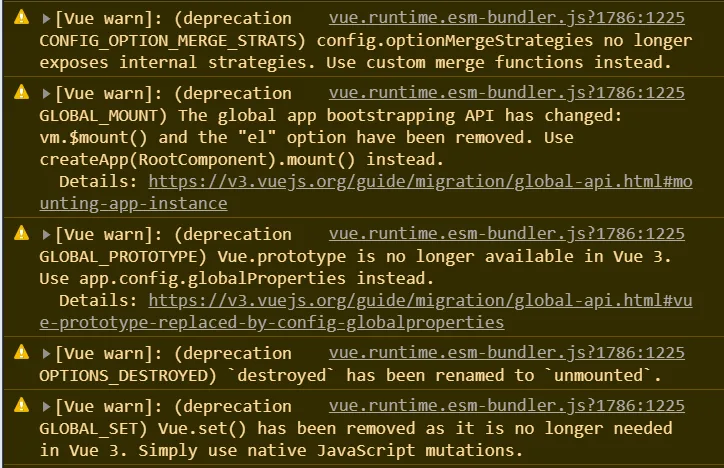
For this example, I'm not using Vue.set(), or destroyed, or most of these other warnings being reported. That's because they all come from dependencies that I'm using (in this case, Vue Router). At this point, let's upgrade our dependencies to use the latest version of the libraries, which should resolve the errors.
Upgrade dependencies
Let's start with upgrading Vue Router. Run the following command in your terminal:
# npm
npm install vue-router@4 vuex@4
We'll first upgrade our router. For this application, it's pretty straightforward. If you have a more complex router configuration, here's the documentation on upgrading Vue Router. Below is our updated configuration (removed code is commented out):
// import Vue from "vue";
// import VueRouter from "vue-router";
import { createRouter, createWebHashHistory } from "vue-router";
import Home from "../views/Home.vue";
import Admin from "../views/Admin.vue";
import Login from "../views/Login.vue";

// Vue.use(VueRouter);

const routes = [
  {
    path: "/",
    name: "Home",
    component: Home,
  },
  {
    path: "/admin",
    name: "Admin",
    component: Admin,
  },
  {
    path: "/login",
    name: "Login",
    component: Login,
  },
];

// const router = new VueRouter({
//   routes,
// });

const router = createRouter({
  routes,
  history: createWebHashHistory()
});

export default router;
Let's go through the changes.
- Rather than import Vue and VueRouter into the file, we use the functions
createRouterandcreateWebHashHistory. The first is what generates the router (rather than invokingnew VueRouter()), while the second defines the mode (historyreplaces themodeoption in the previous version, and is now required). - Because plugins are no longer registered with
Vue.use(), this line is removed. - We create the router using
createRouter()instead ofnew VueRouter(), including the routes and the required history key.
Now let's update our Vuex store. In this code example, we're using a module, which does not have to be changed (how Vuex works has not changed). We only need to update how our Vuex store is initialized.
// import Vue from 'vue'
// import Vuex from 'vuex'
import { createStore } from 'vuex'
import tests from './modules/tests'

// Vue.use(Vuex)

// export default new Vuex.Store({
//   state: {
//   },
//   mutations: {
//   },
//   actions: {
//   },
//   modules: {
//     tests
//   }
// })

export default createStore({
  state: {
  },
  mutations: {
  },
  actions: {
  },
  modules: {
    tests
  }
})
The same concepts we used in the router are applied here. Rather than invoking new Vuex(), we use the new function createStore(). We also don't need to register Vuex, because that's not how plugins are registered in Vue 3.
Finally, let's update our initialization of Vue. Open main.js, and make the following changes:
// import Vue from 'vue'
import { createApp } from 'vue'
import App from './App.vue'
import router from './router'
import store from './store'

import '@/assets/css/tailwind.css'

// Vue.config.productionTip = false

// new Vue({
//   router,
//   store,
//   render: h => h(App)
// }).$mount('#app')

createApp(App)
  .use(router)
  .use(store)
  .mount("#app");
As with the router and Vuex, we no longer use new Vue(), and instead use createApp(). We then chain .use() after that function call to include the router and store (and any other plugins you may have), rather than supplying them as keys in an object. Finally, we call .mount('#app') to render the application in the browser.
If we restart our application at this point, we should have cleared out most, if not all, of the errors we were seeing previously. Go through the remaining errors you see, and try to resolve them. Any components with errors should be properly reporting such in the terminal (see below screenshot). While writing this article, I noticed that the Vue Router was still causing at least one warning to be thrown. Make sure you read the warning message before you start to worry too much, it could just be an alert that there is a behavior change.

Compat Configuration
During this step, you can configure the compatConfig at either the global or component level. For example, if you have components that are using the destroyed lifecycle hook (instead of Vue 3's unmounted), and you really want to disable that feature, you can make the following configuration change:
// Global
import { configureCompat } from 'vue'

configureCompat({
  MODE: 2,
  OPTIONS_DESTROYED: false,
})

// Component
export default {
  compatConfig: {
    MODE: 2,
    OPTIONS_DESTROYED: false,
  },
}
Using this configuration, the destroyed lifecycle hook will not be called. In this case, Vue will continue to report any instances of the destroyed hook in your code, and note that not fixing it could cause runtime errors. Other warnings, such as changes to how watch functions, can simply be disabled if you understand the change, and the risks involved.

Remove Compat Build
Now that we've finished the upgrade, it should be safe to remove the migration build (remember, it's not meant to be included forever!). Run the following command:
# npm
npm uninstall @vue/compat
Then, make sure you undo your changes in vue.config.js. Since we aren't using the compatibility build any more, the alias can be removed, and the vue-loader config can be completely removed. Try running your application again, and make sure you don't have any lingering errors. If not, congratulations! You have successfully migrated to Vue 3!
Conclusion
In this article, we have taken a fairly simple application through the migration process from Vue 2 to 3. Depending on the complexity of your application, you may run into more incompatible features that need to be adjusted, or you may be blocked altogether due to a library/framework you rely on not being ready for Vue 3 yet. Remember that the ecosystem is still working towards adopting Vue 3 as the default, and there is still some way to go before everything will work as we expect. Also, keep in mind that if your application won't be able to make the upgrade, Vue 2.7 will be bringing a large number of features for Vue 3 back to Vue 2.
Remember - this is a major upgrade. Errors and warnings are expected. It could be frustrating at some points. Keep this in mind, and stay curious!
If you weren't following along, here's the link to the application we upgraded. Have a good one!