How to set up local cloud environment with LocalStack
Developers enjoy building applications with AWS due to the richness of their solutions to problems. However, testing an AWS application during development without a dedicated AWS account can be challenging. This can slow the development process and potentially lead to unnecessary costs if the AWS account isn't properly managed.
This article will examine LocalStack, a development framework for developing and testing AWS applications, how it works, and how to set it up.
Assumptions
This article assumes you have a basic understanding of:
- AWS: Familiarity with S3, CloudFormation, and SQS.
- Command Line Interface (CLI): Comfortable running commands in a terminal or command prompt.
- JavaScript and Node.js: Basic knowledge of JavaScript and Node.js, as we will write some code to interact with AWS services.
- Docker Concepts: Understanding of Docker basics, such as images and containers, since LocalStack runs within a Docker container.
What is LocalStack?
LocalStack is a cloud service emulator that runs in a single container on your laptop or in your CI environment. With LocalStack, you can run your AWS applications or Lambdas entirely on your local machine without connecting to a remote cloud provider! Whether you are testing complex CDK applications or Terraform configurations or just beginning to learn about AWS, LocalStack simplifies your testing and development workflow, relieving you from the complexity of testing AWS applications.
Prerequisite
Before setting up LocalStack, ensure you have the following:
-
Docker Installed: LocalStack runs in a Docker container, so you need Docker installed on your machine. You can download and install Docker from here.
-
Node.js and npm: Ensure you have Node.js and npm installed, as we will use a simple Node.js application to test AWS services. You can download Node.js from here.
-
Python: Python is required for installing certain CLI tools that interact with LocalStack. Ensure you have Python 3 installed on your machine. You can download Python from here.
Installation
In this article, we will use the LocalStack CLI, which is the quickest way to get started with LocalStack. It allows you to start LocalStack from your command line. Localstack spins up a Docker instance,
Alternative methods of managing the LocalStack container exist, and you can find them here.
To install LocalStack CLI, you can use homebrew by running the following command:
brew install localstack/tap/localstack-cli
If you do not use a macOS or you don’t have Brew installed, you can install the CLI using Python:
python3 -m pip install --upgrade localstack
To confirm your installation was successful, run the following:
localstack --version
That should output the installed version of LocalStack. Now you can start LocalStack by running the following command:
localstack start
This command will start LocalStack in docker mode, and since it is your first installation, try to pull the LocalStack image. You should see the below on your terminal
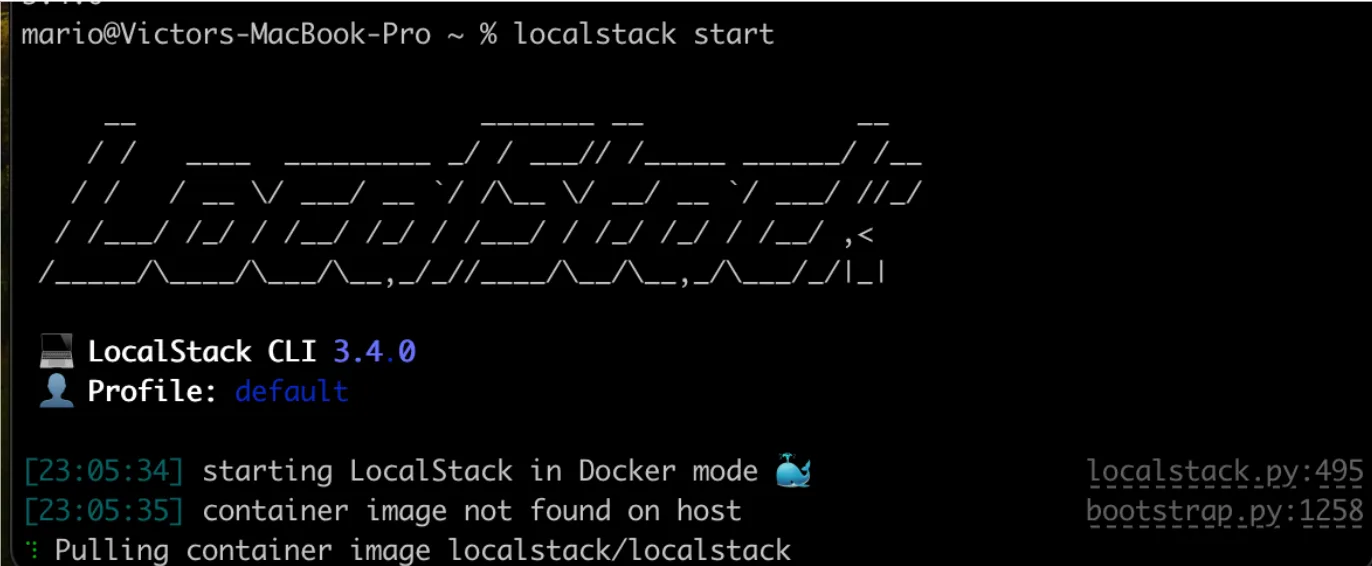
After the image is downloaded successfully, the docker instance is spun up, and LocalStack is running on your machine on port 4566.
Testing AWS Services with LocalStack
LocalStack lets you easily test AWS services during development. It supports many AWS products but has some limitations, and not all features are free.
Community Version: Free access to core AWS products like S3, SQS, DynamoDB, and Lambda. Pro Version: Access to more AWS products and enhanced features.
Check the supported community and pro version resources for more details.
We're using the community edition, and the screenshot below shows its supported products. To see the current products supported in the community edition, visit http://localhost:4566/_localstack/health.
This article will test AWS CloudFormation and SQS.
Before we can start testing, we need to create a simple Node.js app. On your terminal, navigate to the desired folder and run the following command:
npm init -y
This command will create a package.json file at the root of the directory.
Now we need to install aws-sdk. Run the following command:
npm i aws-sdk
With that installed, we can now start testing various services.
AWS CloudFormation
AWS CloudFormation is a service that allows users to create, update, and delete resources in an AWS account. This service can also automate the process of provisioning and configuring resources. We are going to be using LocalStack to test creating a CloudFormation template.
In the root of the folder, create a file called cloud-formation.js. This file will be used to create a CloudFormation stack that will be used to create an S3 bucket.
Add the following code to the file:
const AWS = require('aws-sdk');

const cloudFormation = new AWS.CloudFormation({
  region: 'us-east-1',
  endpoint: 'http://localhost:4566',
  credentials: new AWS.Credentials("test", "test")
});

const params = {
  StackName: 'test-local-stack',
  TemplateBody: `
        {
          "Resources": {
            "TestBucket": {
                "Type": "AWS::S3::Bucket"
            }
          }
        }
    `,
};

cloudFormation.createStack(params, (err, data) => {
  if (err) {
    console.log(err);
  } else {
    console.log(data);
  }
});
In the above code, we import the aws-sdk package, which provides the necessary tools to interact with AWS services.
Then, an instance of the AWS.CloudFormation class is created. This instance is configured with:
region: The AWS region where the requests are sent. In this case, us-east-1 is the default region for LocalStack.
endpoint: The URI to send requests to is set to http://localhost:4566 for LocalStack. You should configure this with environment variables to switch between LocalStack for development and the actual AWS endpoint for production, ensuring the same code can be used in both environments.
credentials: The AWS credentials to sign requests with. We are passing new AWS.Credentials("test", "test")
The params object defines the parameters needed to create the CloudFormation stack:
StackName: The name of the stack. Here, we are using 'test-local-stack'. TemplateBody: A JSON string representing the CloudFormation template. In this example, it defines a single resource, an S3 bucket named TestBucket.
The createStack method is called on the CloudFormation client with the params object. This method attempts to create the stack. If there is an error, we log it to the console else, we log the successful data to the console.
Now, let’s test the code by running the following command:
node cloud-formation.js
If we run the above command, we should see the JSON response on the terminal.
{
  "ResponseMetadata": { "RequestId": "6617f848-91b2-42d6-becb-fae9669c8f9d" },
  "StackId": "arn:aws:cloudformation:us-east-1:000000000000:stack/test-local-stack/651b1847"
}
AWS SQS
The process for testing SQS with LocalStack using the aws-sdk follows the same pattern as above, except that we will introduce another CLI package, awslocal.
[awslocal](https://github.com/localstack/awscli-local) is a thin wrapper and a substitute for the standard aws command, enabling you to run AWS CLI commands within the LocalStack environment without specifying the --endpoint-url parameter or a profile.
To install awslocal, run the following command on your terminal:
pip3 install awscli-local
Next, let’s create an SQS queue using the following command:
awslocal sqs create-queue --queue-name test-queue
This will create a queue name test-queue and return queueUrl like below:
{
    "QueueUrl": "http://sqs.us-east-1.localhost.localstack.cloud:4566/000000000000/test-queue"
}
Now, in our directory, let’s create a sqs.js file, and inside of it, let’s paste the following code:
const AWS = require('aws-sdk');

const sqs = new AWS.SQS({
  endpoint: 'http://localhost:4566',
  region: 'us-east-1',
  credentials: new AWS.Credentials('test', 'test'),
});

const queueUrl = 'http://sqs.us-east-1.localhost.localstack.cloud:4566/000000000000/test-queue'; //Replace with your queue URL

const params = {
  QueueUrl: queueUrl,
  MessageBody: 'Testing SQS with LocalStack',
};

sqs.sendMessage(params, (err, data) => {
  if (err) {
    console.log(err);
  } else {
    console.log(data);
  }
});
In the above code, an instance of the AWS.SQS class is created. The instance is configured with the same parameters as when creating the CloudFormation. We also created a params object which had the required properties needed to send a SQS message:
QueueUrl: The URL of the Amazon SQS queue to which a message is sent. In our case, it will be the URL we got when we created a local SQS. Make sure to manage this in environment variables to switch between LocalStack for development and the actual AWS queue URL for production, ensuring the same code can be used in both environments.
MessageBody: The message to send.
We call the sendMessage method, passing the params object and a callback that handles error and data, respectively.
Let’s run the code using the following command:
node sqs.js
We should get a JSON object in the terminal like the following:
{
  "MD5OfMessageBody": "0c2a2ee858510ceee21a7d57f96cdc85",
  "MessageId": "e8857ade-45ce-45c7-9d56-3faa0bee70e5"
}
To test if we can receive the SQS message sent, let’s create a sqs-receive.js. Inside the file, we can copy over the AWS.SQS instance that was created earlier into the file and add the following code:
…
const queueUrl = 'http://sqs.us-east-1.localhost.localstack.cloud:4566/000000000000/test-queue'; //Replace with your queue URL

const params = {
  QueueUrl: queueUrl,
  MaxNumberOfMessages: 10,
  VisibilityTimeout: 60,
  WaitTimeSeconds: 20,
};

sqs.receiveMessage(params, (err, data) => {
  if (err) {
    console.log(err);
  } else {
    console.log(data);
  }
});
Run the code using the following command:
node sqs-receive.js
We should receive a JSON object and should be able to see the previous message we sent
{
  "Messages": [
    {
      "MessageId": "e8857ade-45ce-45c7-9d56-3faa0bee70e5",
      "ReceiptHandle": "MmMwOThlYjAtYzRmYi00OTkxLTlhNDMtYzY3YTJjZjJlNzQwIGFybjphd3M6c3FzOnVzLWVhc3QtMTowMDAwMDAwMDAwMDA6dGVzdC1xdWV1ZSBlODg1N2FkZS00NWNlLTQ1YzctOWQ1Ni0zZmFhMGJlZTcwZTUgMTcxNzk3OTQzMy41NjEwNjEx",
      "MD5OfBody": "0c2a2ee858510ceee21a7d57f96cdc85",
      "Body": "Testing SQS with LocalStack"
    }
  ]
}
When you are done with testing, you can shut down LocalStack by running the following command:
localstack stop
Conclusion
In this article, we looked at how to set up a local cloud environment using LocalStack, a powerful tool for developing and testing AWS applications locally. We walked through the installation process of LocalStack and demonstrated how to test AWS services using the AWS SDK, including CloudFormation and SQS.
Setting up LocalStack allows you to simulate various AWS services on your local machine, which helps streamline development workflows and improve productivity. Whether you are testing simple configurations or complex deployments, LocalStack provides the environment to ensure your applications work as expected before moving to a production environment.
Using LocalStack, you can confidently develop and test your AWS applications without an active AWS account, making it an invaluable tool for developers looking to optimize their development process.